

The making-of Lemmy the Robot has been published on the September 2014 issue of 3D Creative Magazine. On their website it’s possible to see a preview of it, or to buy the full issue:
INTRODUCTION
A friend of mine, Benjamin Piñeros, is directing his own independent short film titled ‘Servicios Públicos’. Conceptually speaking, the project is a mix of Metropolis, Brazil, and Blade Runner, and will take place in a dystopian South American city. The idea is intriguing and he assembled a great team of artists that have spent lots of time and effort to build a particular universe that so far seems very promising! They have a production diary and a website: www.estamosobservando.com
I’ve been asked to work on Lemmy the Robot, one of the characters of the film. Benjamin gave me the concept art, some reference materials and a model he made himself. I worked in complete freedom and he reviewed my work when I had something cool to show or ideas to suggest.
 ‘Servicios Públicos’ concept art used as reference for Lemmy the Robot.
MODELLING
The trick here was to add details to make the robot feel realistic and believable, but at the same time to keep that vintage naive feeling of the robots of the 50s. I tweaked the volumes of the shoulders to give more strength to the parts and rebuilt the hands in a very old fashioned way. Then I started to add features like bolts, wires, and a plug hole, trying to link them to an hypothetical brain in the head. I also wanted to give the impression that the robot has been fixed and upgraded over the years, adding additional details like plaques and welds.
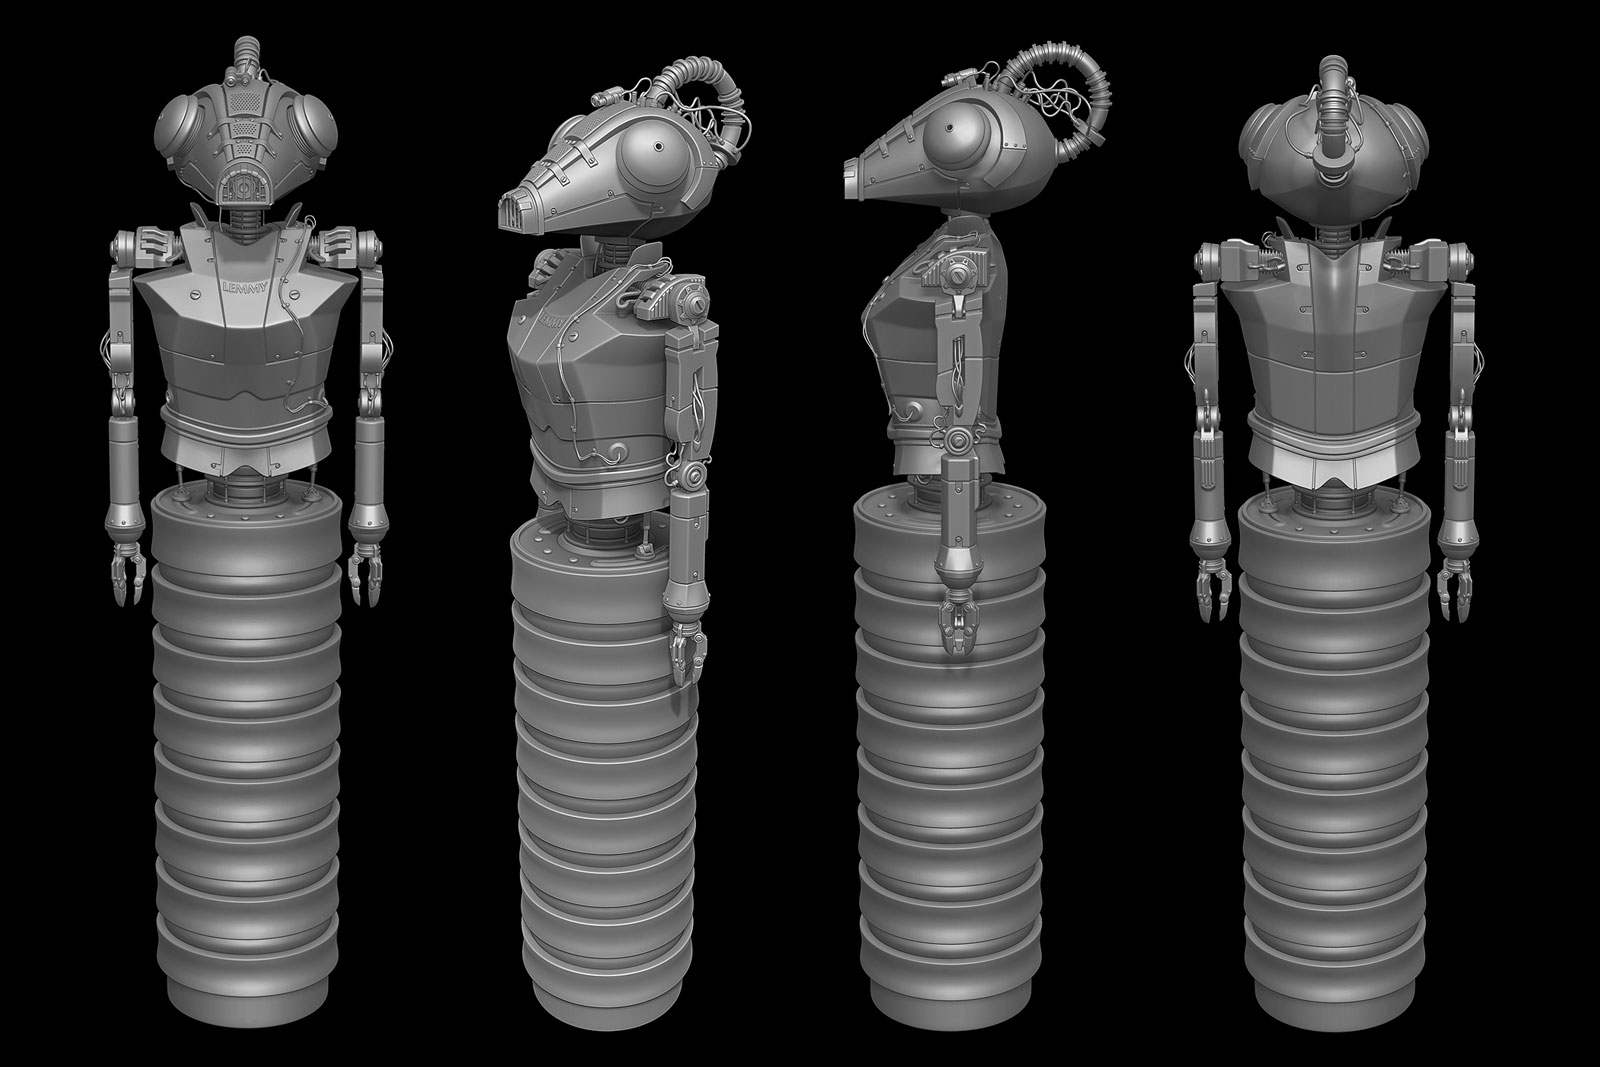
Fully detailed model. Few minors details (small rivets, eyes grids and writings) are still missing.Those details will be done with normal maps.
TEXTURING PART 1
I wanted to try nDo and dDo in my texture workflow to see if I could improve quality and speed up my workflow as well. I split Lemmy into 5 UDIMs (head, chest, left arm, right arm, bottom) and I used nDo to create minor details on the various textures, like the grid on the eyes and the writings on the jaw. Then I assigned the dDo reference materials to the various surfaces of the robot, like painted metal, iron, rubber, plastic and so on. Then I baked a diffuse map and an ambient occlusion map in 3D Studio. I converted the Normal Map in tangent space generated in nDo into a world space one using xNormal (great free software to create and convert normal maps) and I plugged all of those plus an exported obj of my meshes into dDo.
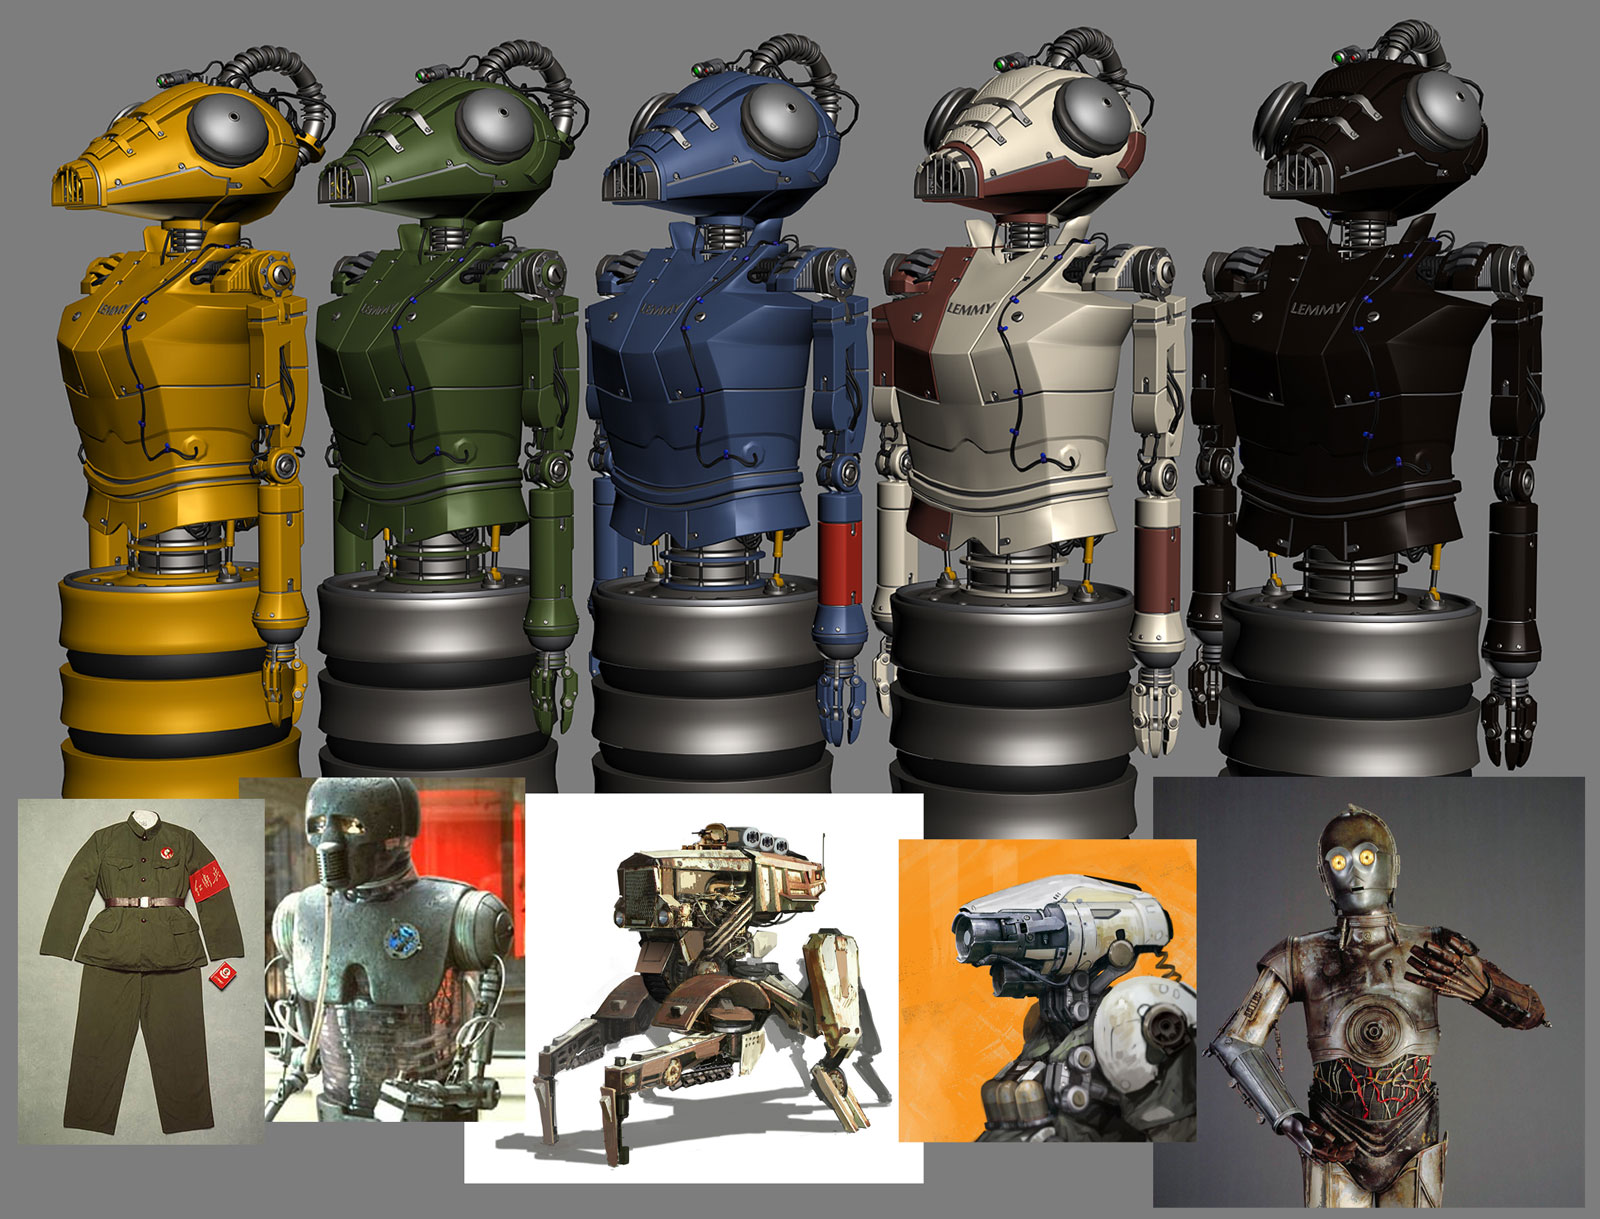 Color schemes I proposed to the director with some references to give a better idea. The final choice of the director was a mix of the third and fourth variant.
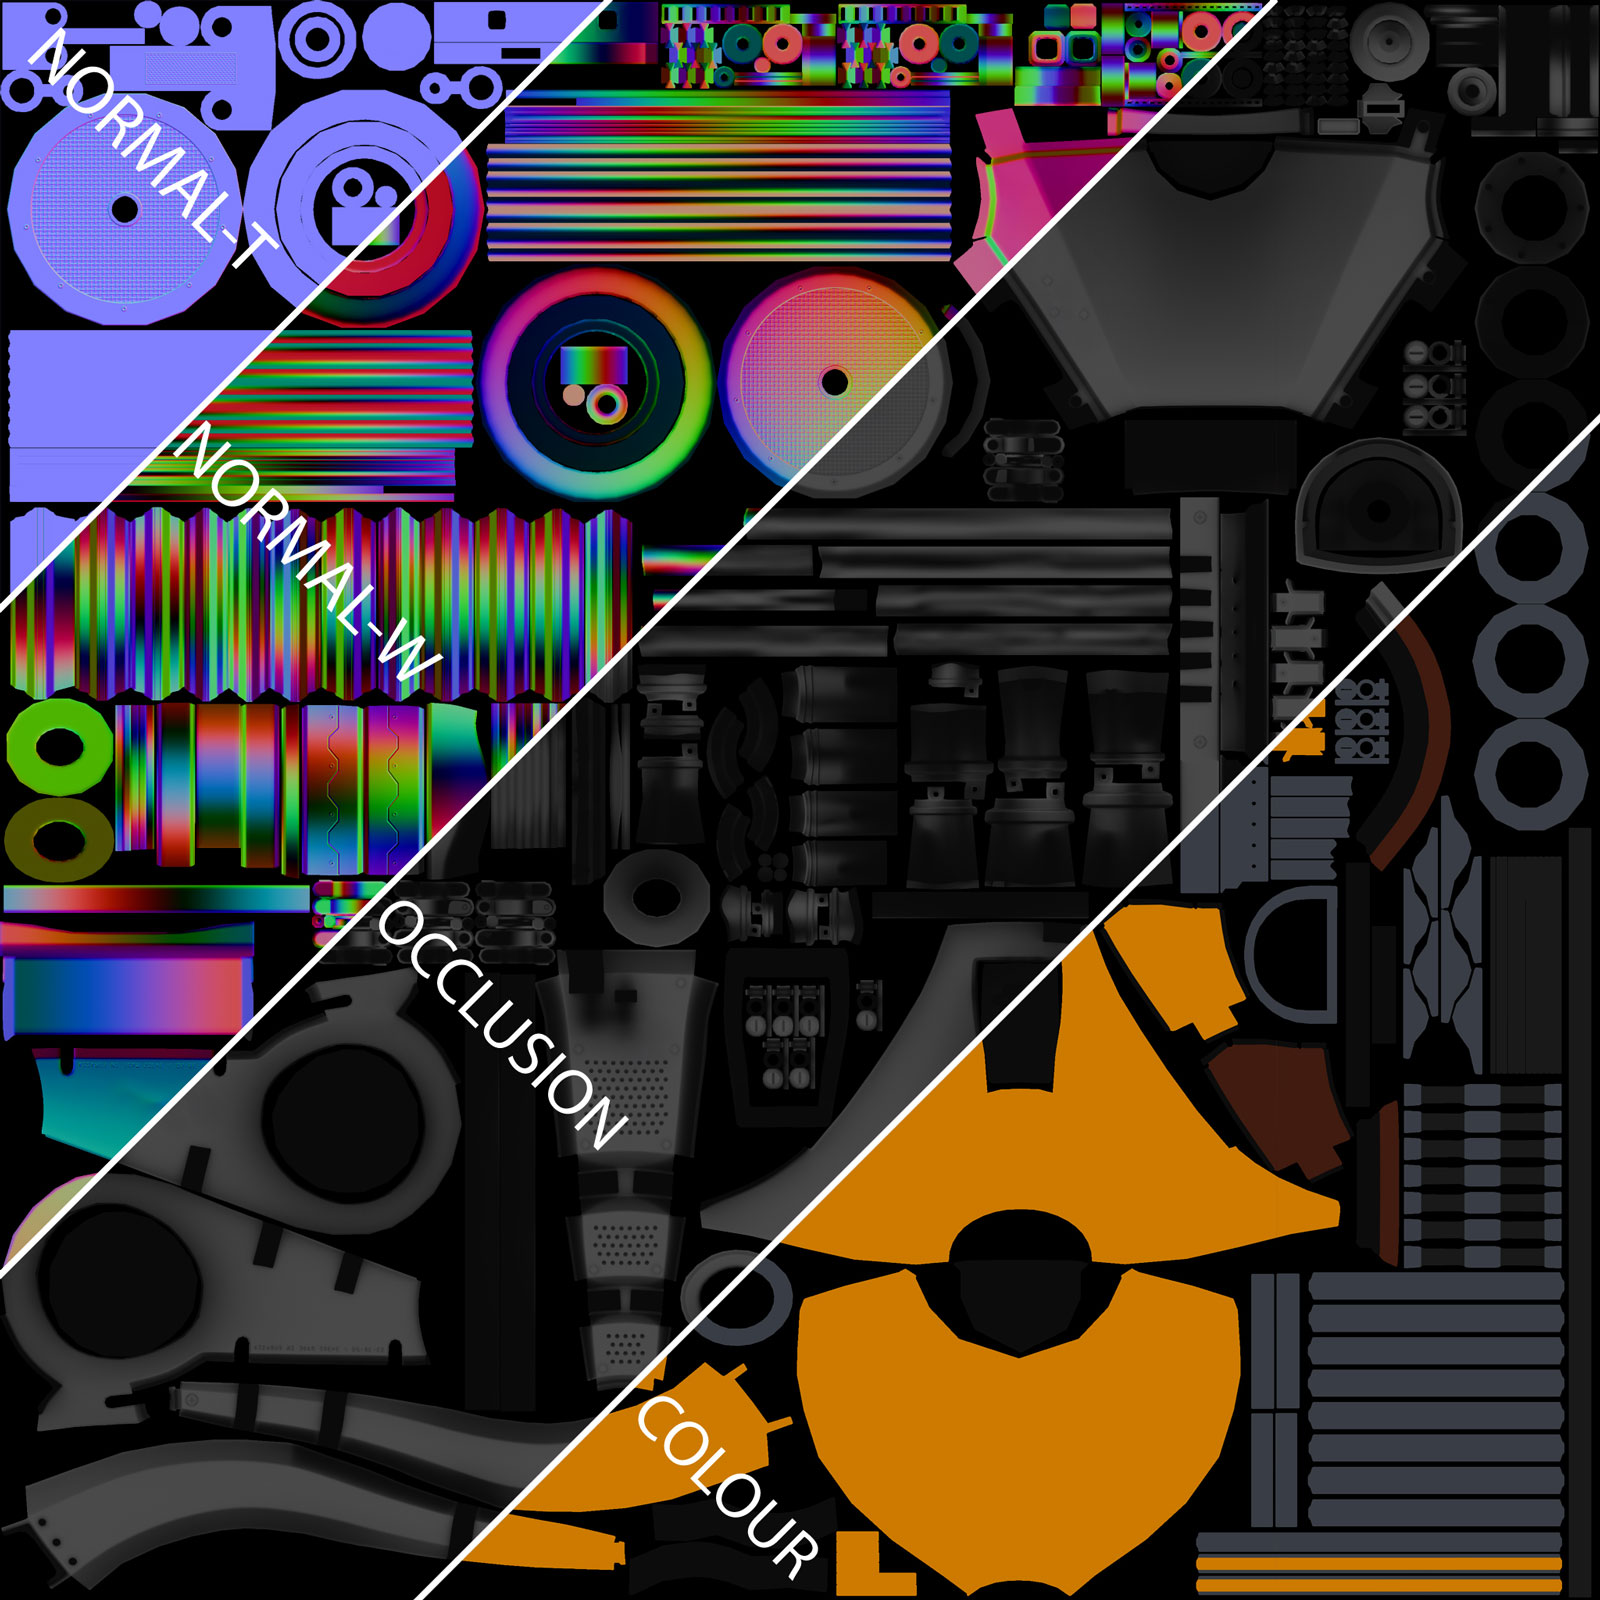 Sample of the maps I used in dDo to create the textures (Lemmy’s head)
TEXTURING PART 2
I’d like to say that dDo is an amazing piece of software. It really boosts the quality of the textures with just a few clicks. It keeps diffuse, specular, glossiness, bump and normal maps tidy and up to date all the time.
I used Marmoset Skyshop for previewing purposes and it’s truly is a great tool. The only problem is that it can handle only one texture at a time. But I was able to save presets for all the shared materials, so the workflow was still easy and quick. I still used photographic references to make the various materials more realistic and detailed, but on top of those, most of the scratches, rust, dust, leaks, oxidation, edge highlights and so on were done in dDo.
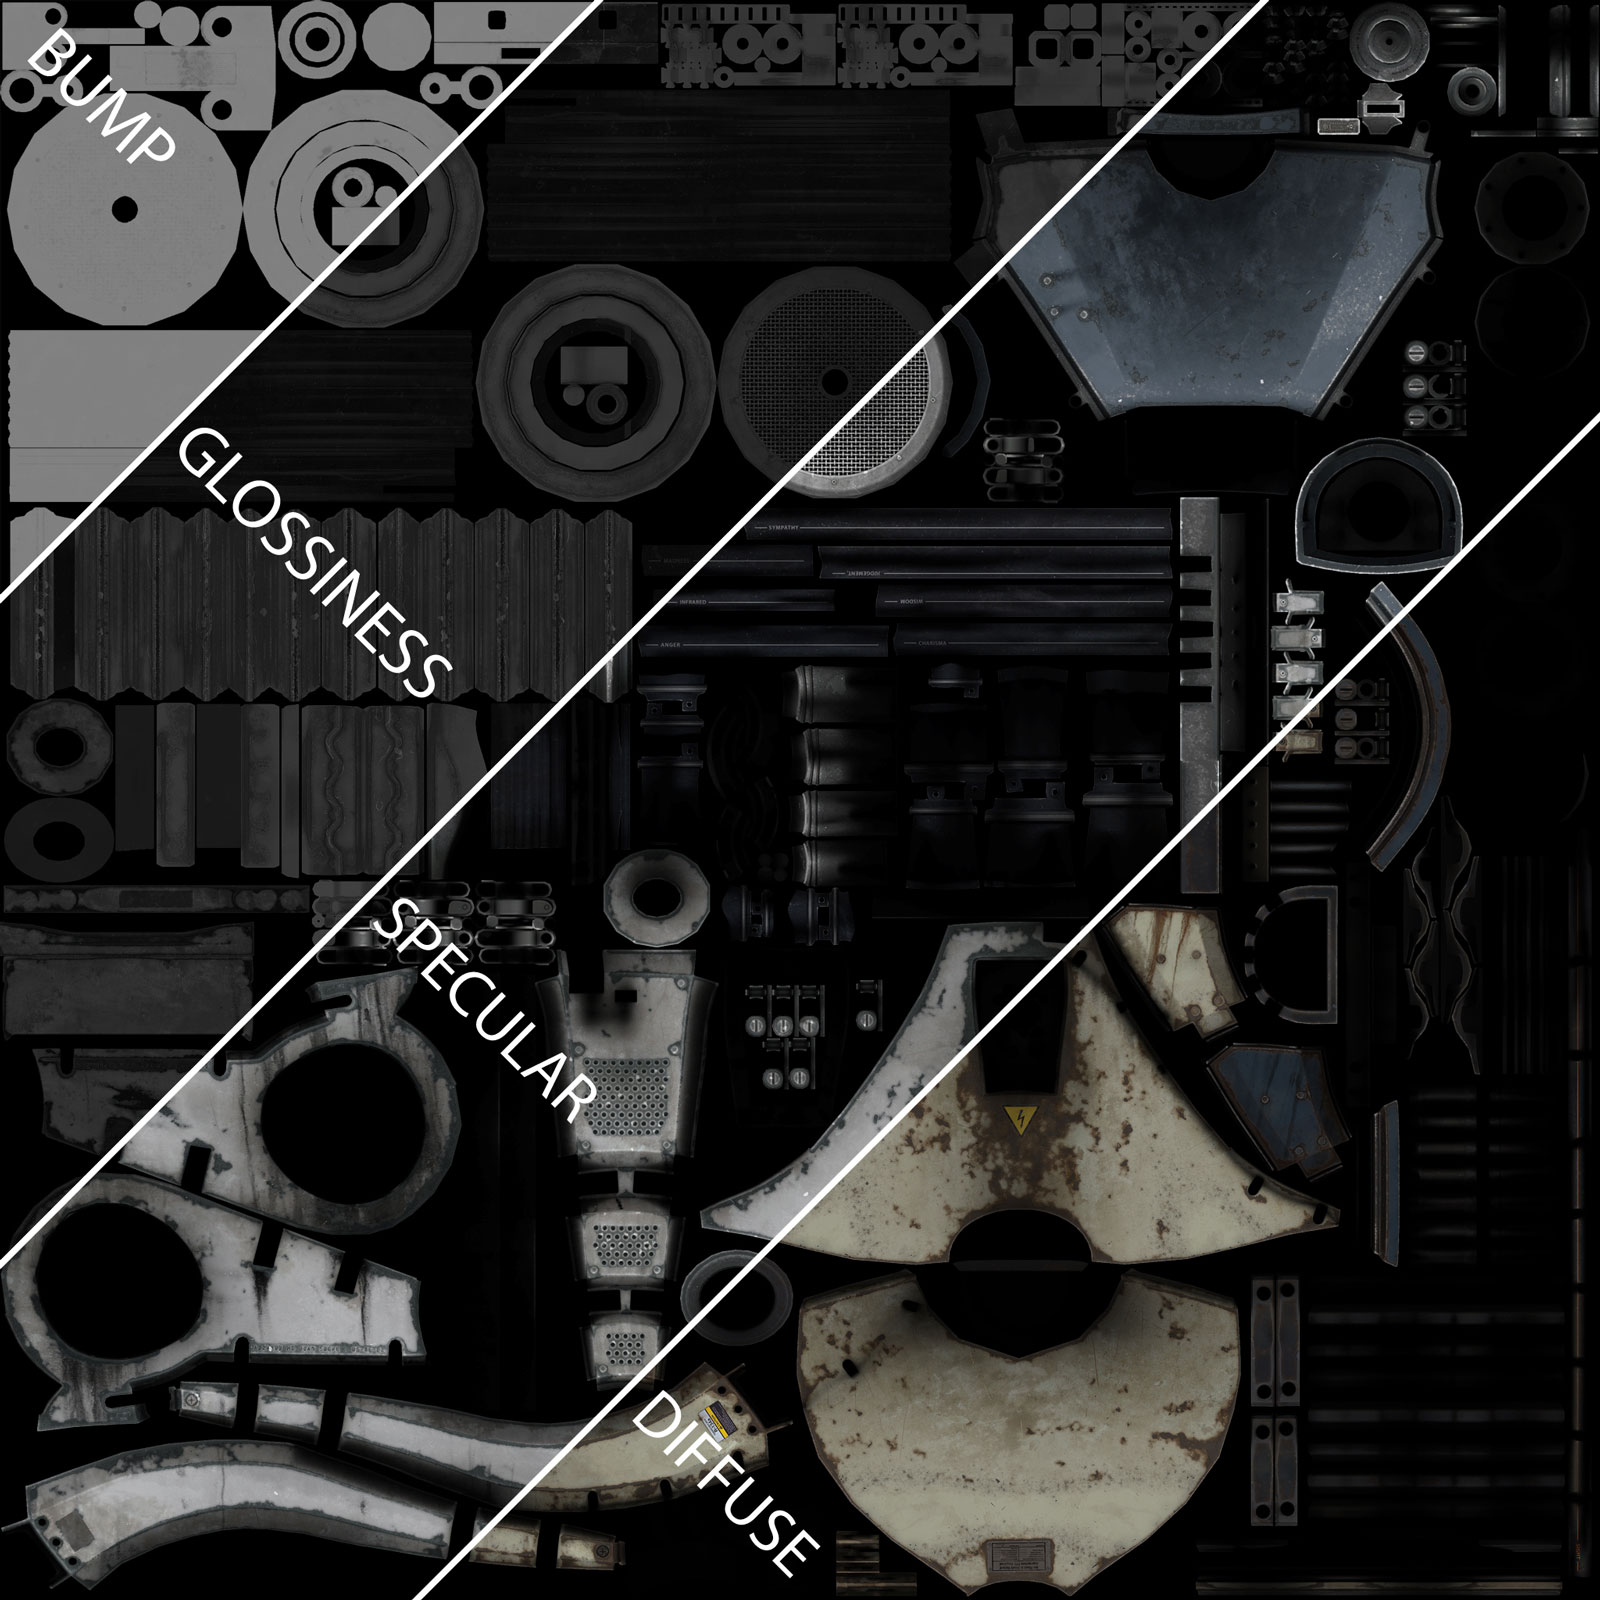 Sample of the textures generated in dDo using both photographic references and dDo procedural details.
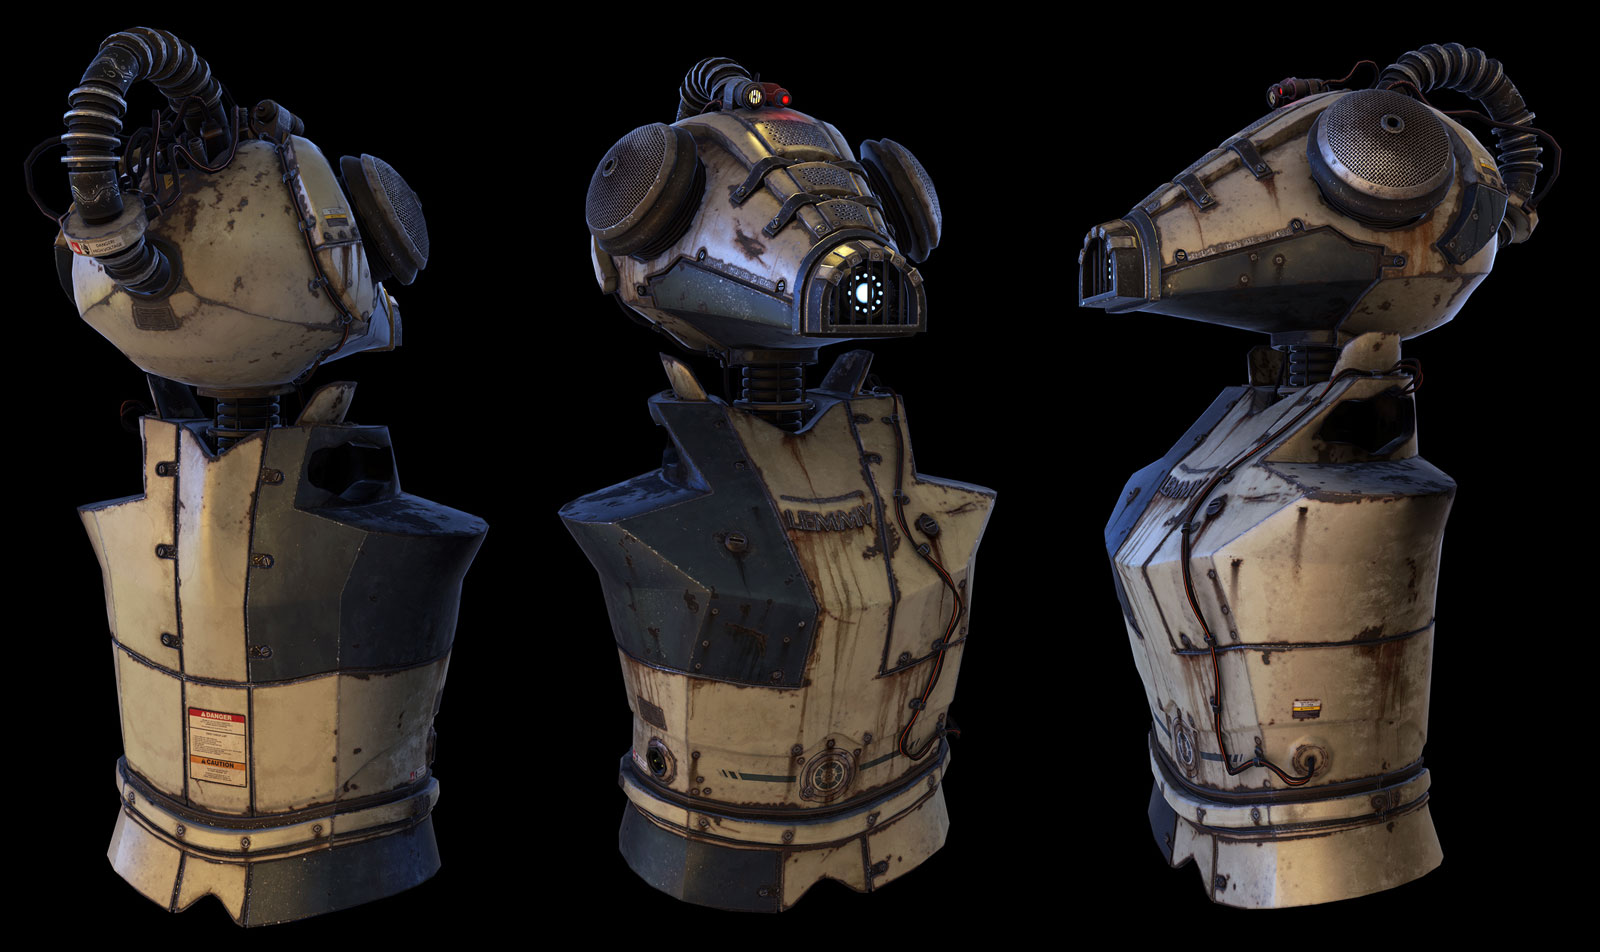 The quality of the preview in Marmoset Skyshop is amazing. With minimal effort it’s possible to create very good asset presentations.
SCENE SETUP
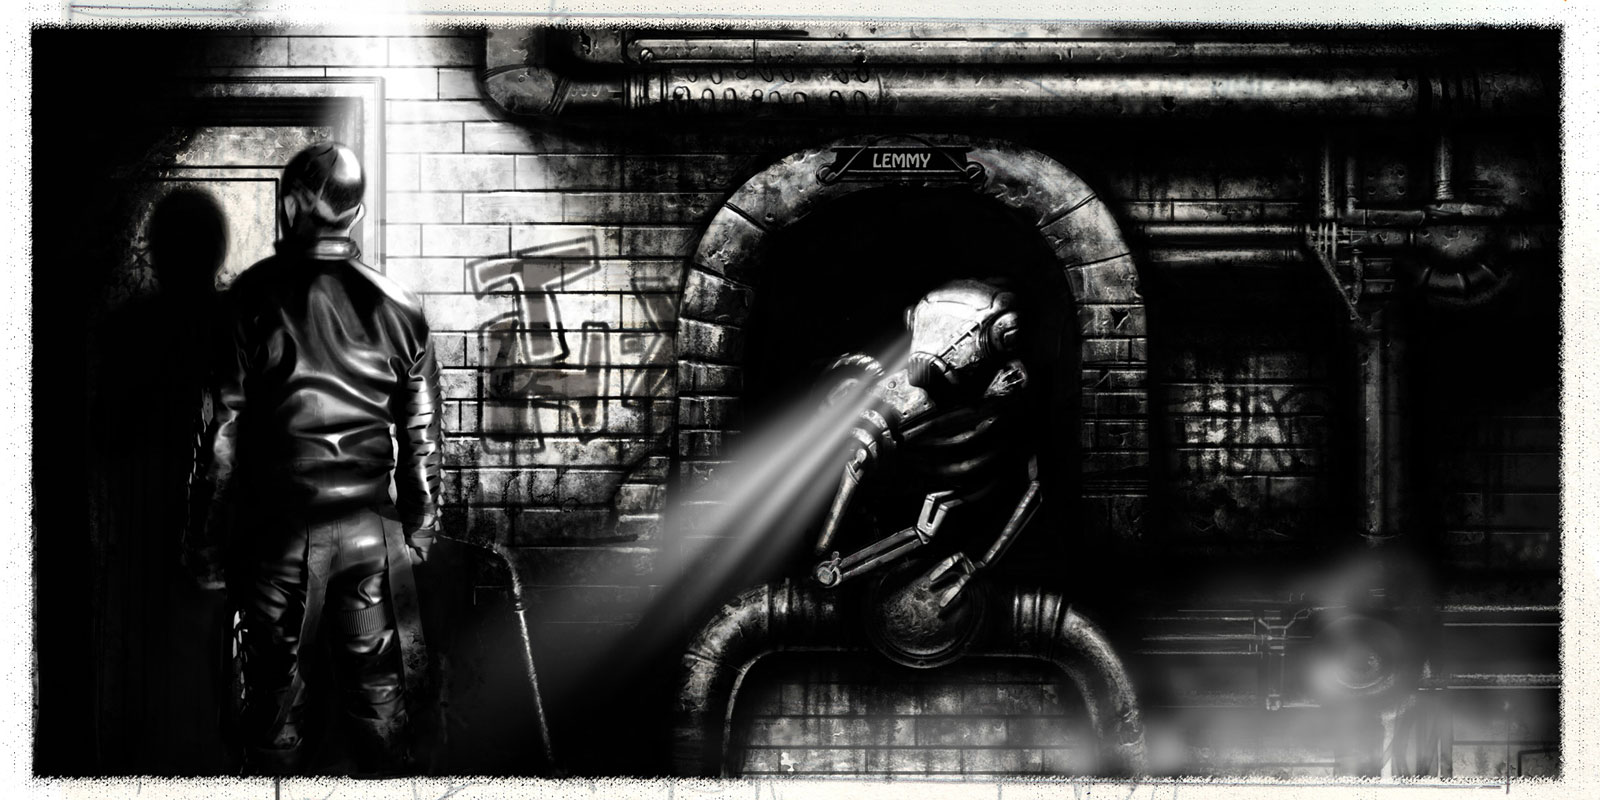
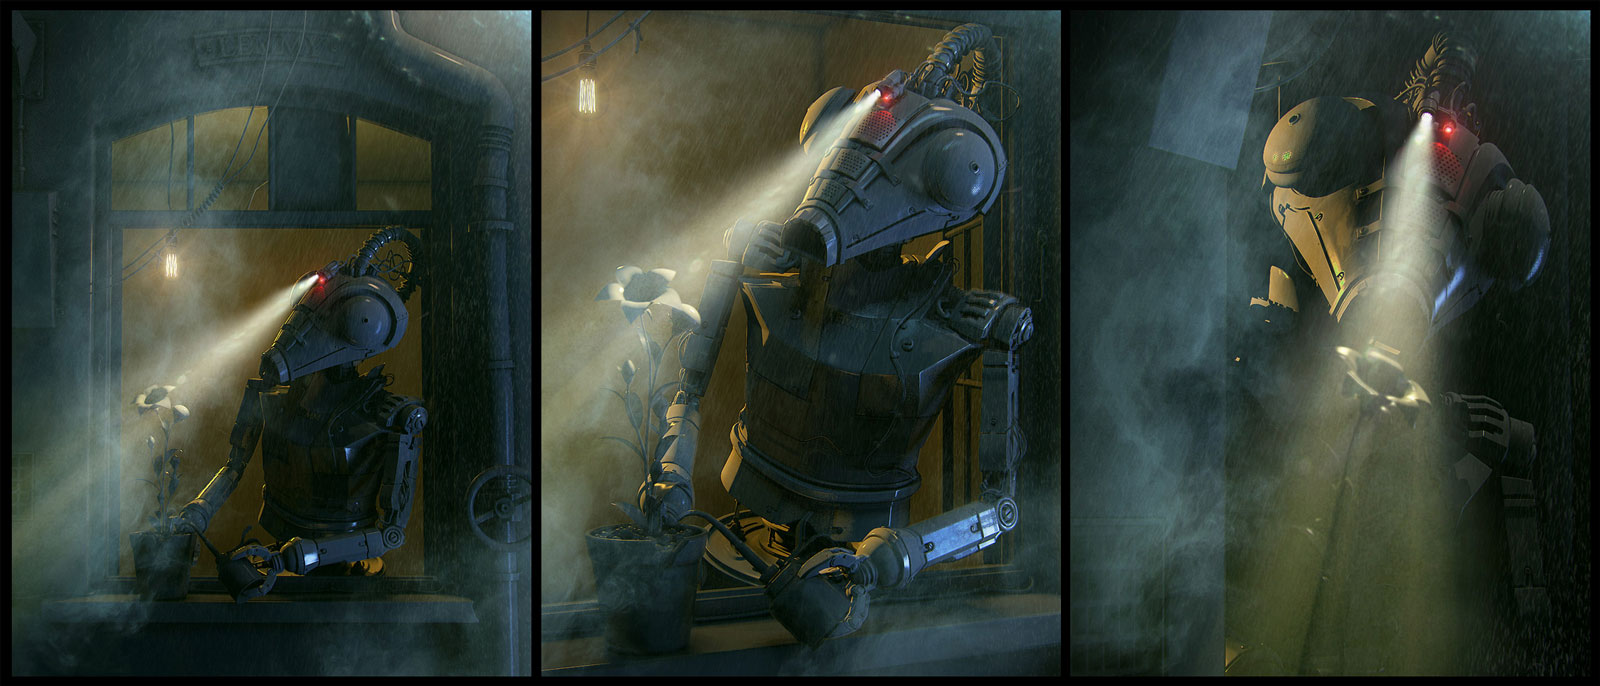
Once I completed the robot I decided to add a gloomy environment and give him an action to perform in the scene. I found lots of good references in the alleyways of London so I took some photos and used them to model and texture the environment. I blocked out the volumes, the objects, the composition, adding or removing stuff, shifting objects around, and placing many cameras, trying to capture the mood in a sequence of 3 or 4 shots. When I was satisfied with the camera positions I modelled and properly textured only the objects that were to be visible in the frame. That method gave me more freedom to experiment and I saved time in the end.
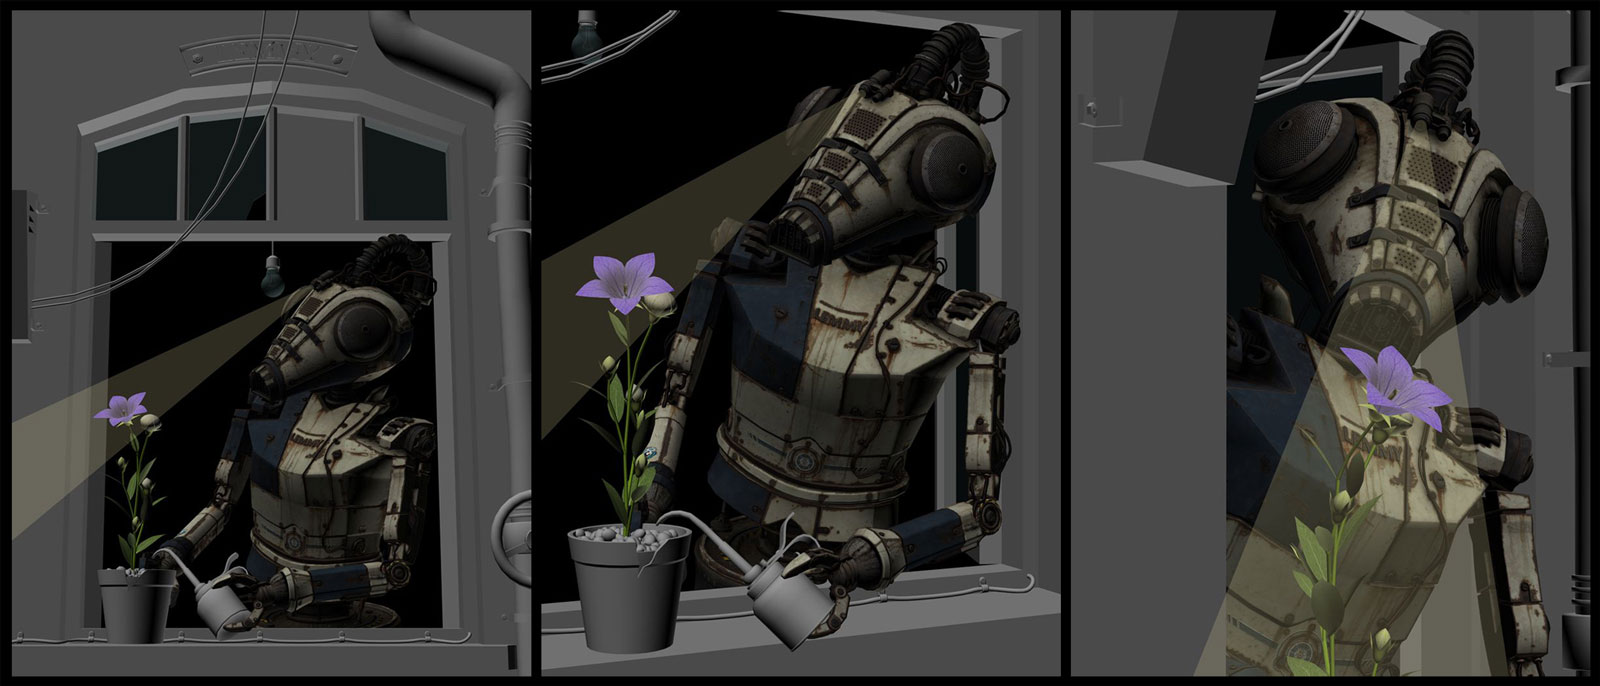 I proposed a set of 4 shots to my friend and, after his notes I cut them down to 3.
LIGHTING
I decided to start playing around with the lighting while I was texturing, and only after I finished modelling all the geo. The main idea was to have a cold blue street light as key light, and use the moon light as fill light. I also used a light inside the room as rim. Those were the three main light sources. Then I added a couple of extra lights to get a nice silhouette, plus another light in a slightly different position inside the house to enhance Lemmy. Since Lemmy’s metal was quite shiny I added an IBL as dome light, but I used it only for reflections. In the end I used only one warm light: Lemmy’s volume light, which he uses to irradiate the flower.
 I rendered a pass for each light contribution in clay so I could composite everything in Photoshop. Then I added flares, smoke and rain as cards.
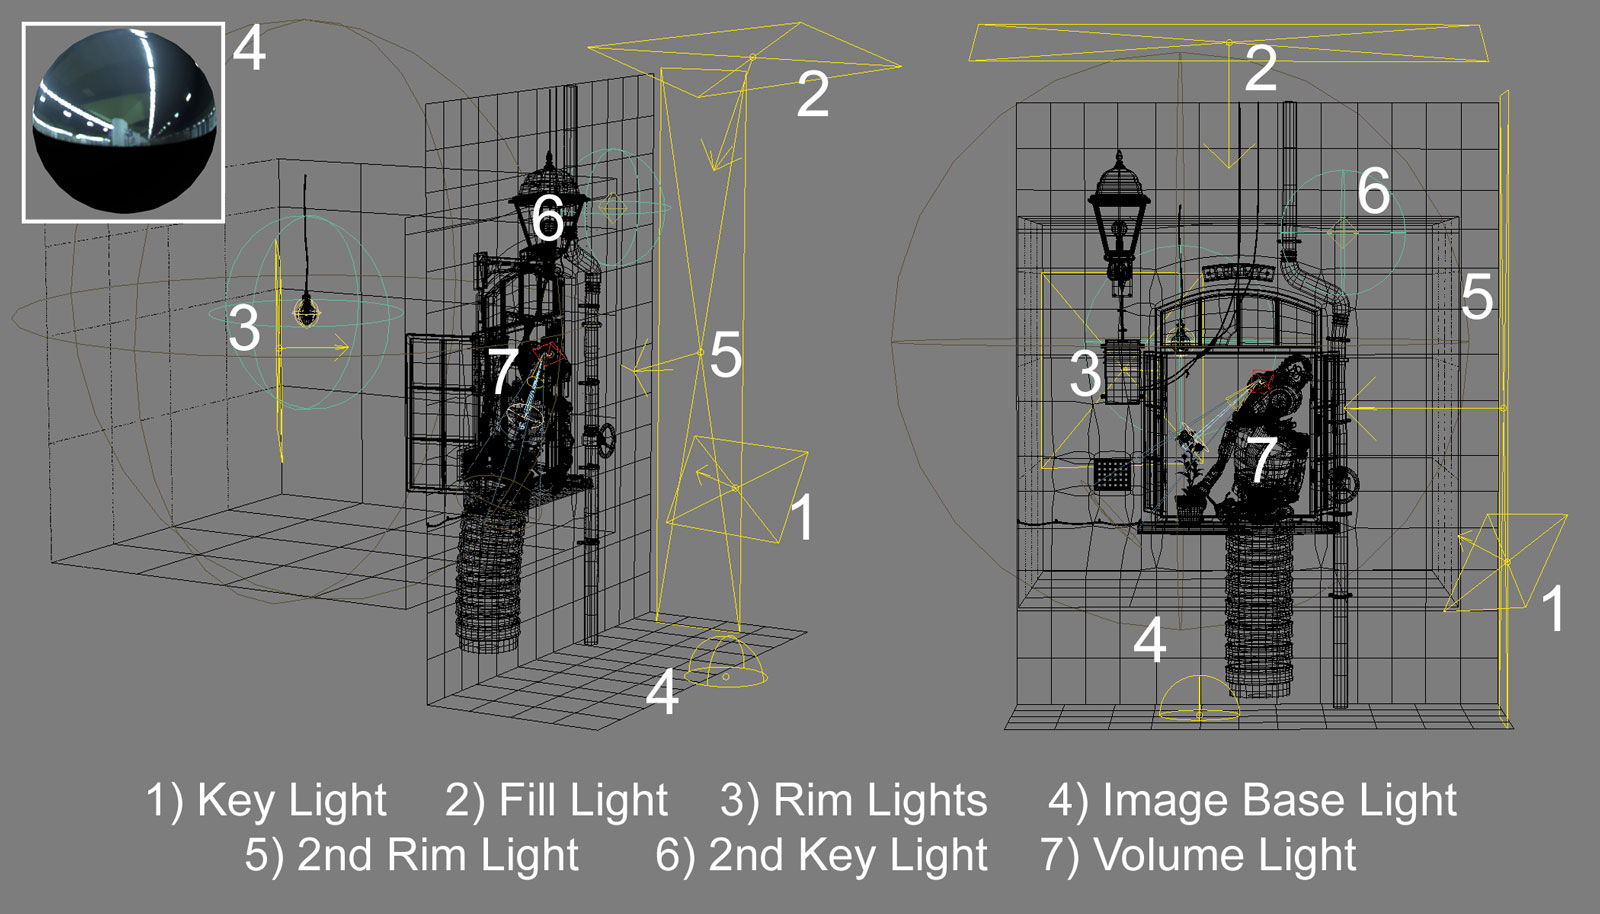 The most important lights are the first three. The IBL is used only for reflections. The others give a minor contribution to specific areas.
RENDERING
I worked in linear workflow. This was extremely effective since my scene was quite dark. I didn’t have to go crazy with sampling in order to get rid of the noise, and yet render times were still fast. I split the final render into several passes, so I could edit all the aspects of every render the way I wanted as I already did with the clay renders. Vray is quite amazing in these terms and the range of available passes is incredibly vast. I added every pass only when I realized I was going to need it. It’s all about having the data in the most versatile way for later compositing.
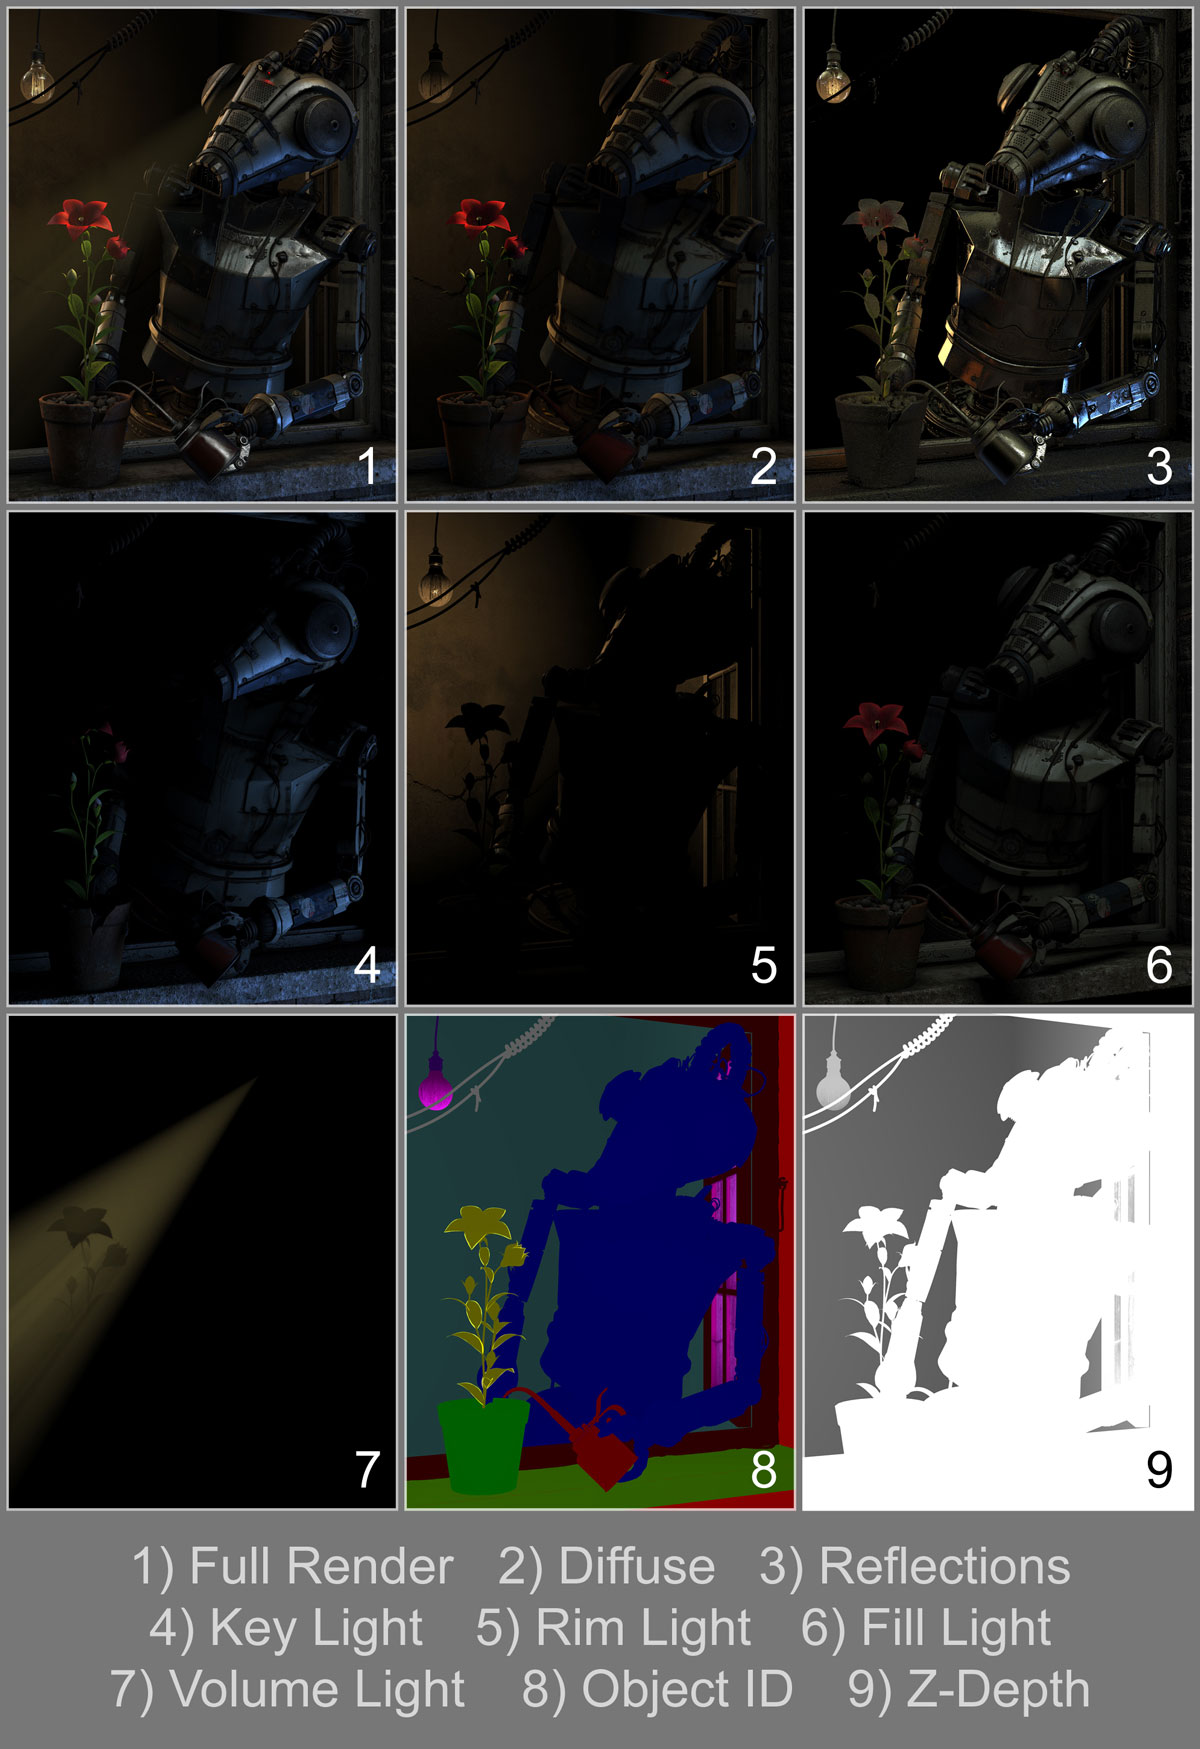 List of the passes I used. They are all self-explanatory. Object ID was used to quickly create masks in Photoshop. Z-Depth was used also to add a slight mist.
COMPOSTING
First of all I started to ease out Lemmy’s reflections masking out the color and reflection passes to show the diffuse pass. Then I tweaked the light contributions adding in “screen” mode for each light pass. I did some minor tweaks on the wall and window to get a better silhouette of Lemmy in the foreground. Then I added the z-depth, mainly to have the room interior out of focus. I improved the various flares and smoke cards from the early render tests and finally did some color correction on Lemmy and the flower to make them warmer compared to the rest. And finally I added a vignette effect.
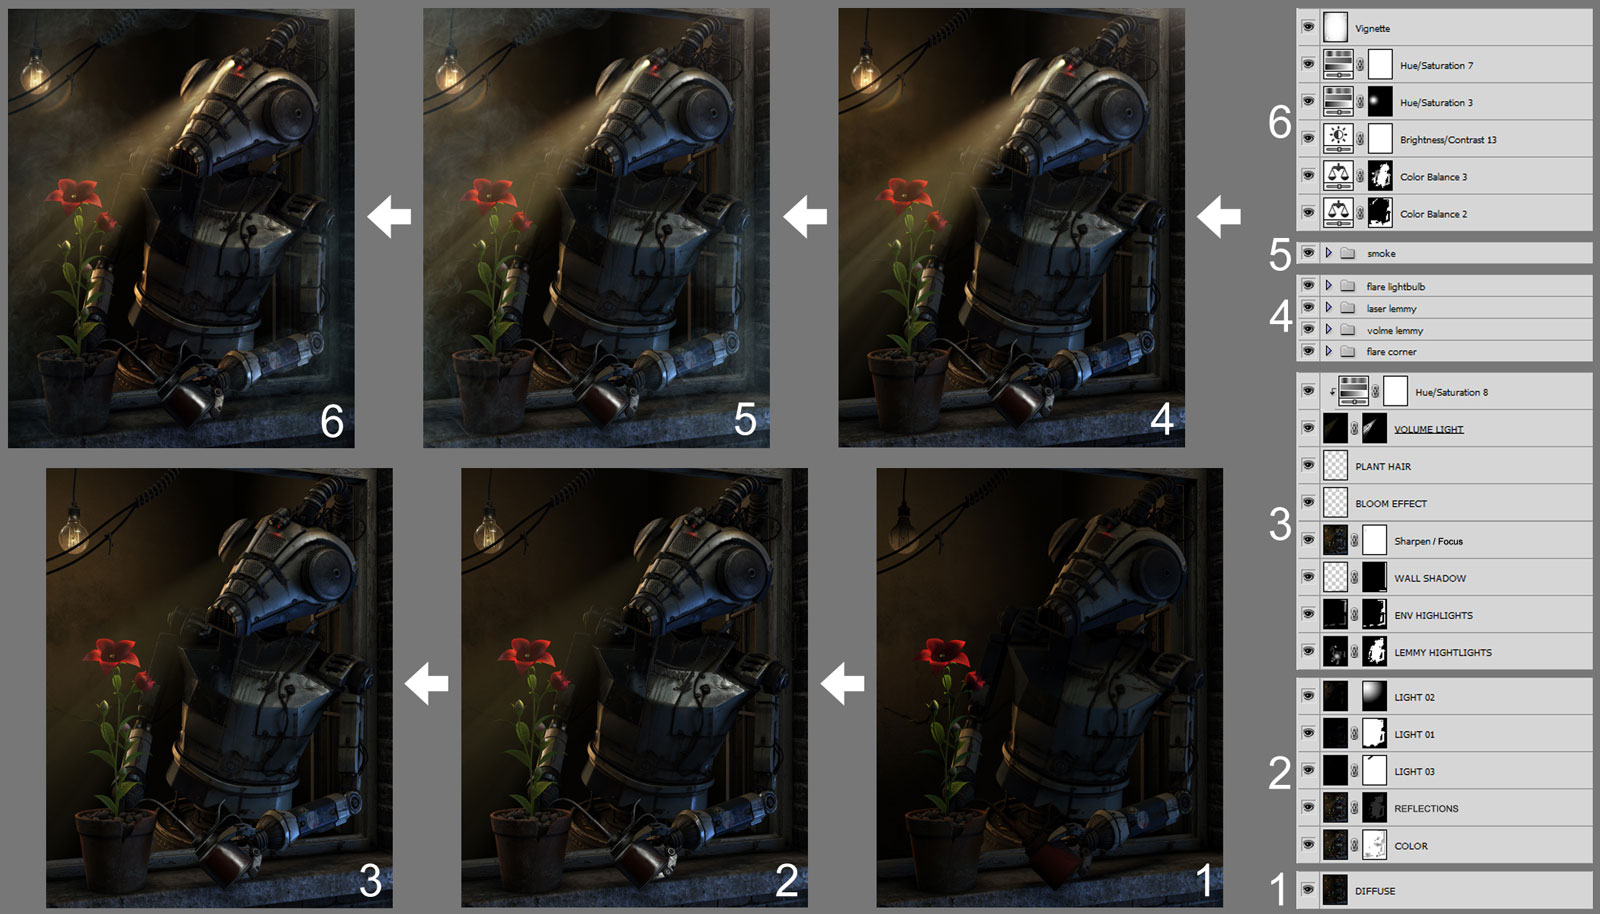 I never merge layers in Photoshop, so I can always change the source layers without losing the work I’ve done.
TOP TIP:
I always create lots of cameras during the lighting and rendering processes. I also flip or rotate my renders by 90°, in order to give a fresh look to the piece. Trying to look at the same image from different perspectives helps me catch the best details of my models. Usually, staring at the same image over and over again tends to bore me. So I trick myself this way and it works! After all the first glance is the most important one. These two shots are my favourites out of around a dozen I did and scraped for this project.
To see the final images please refer to this page!